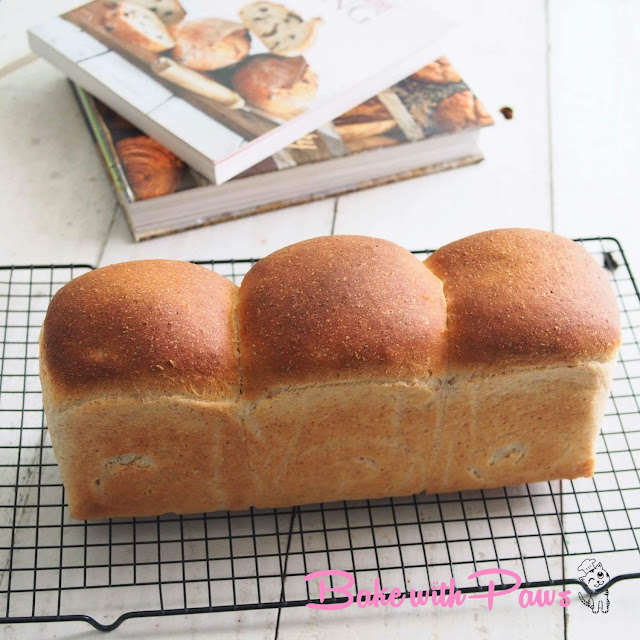
I am back to my soft sourdough bread baking. I have tried various types of soft sourdough bread and have not tried using wholemeal flour in my sourdough bread yet.
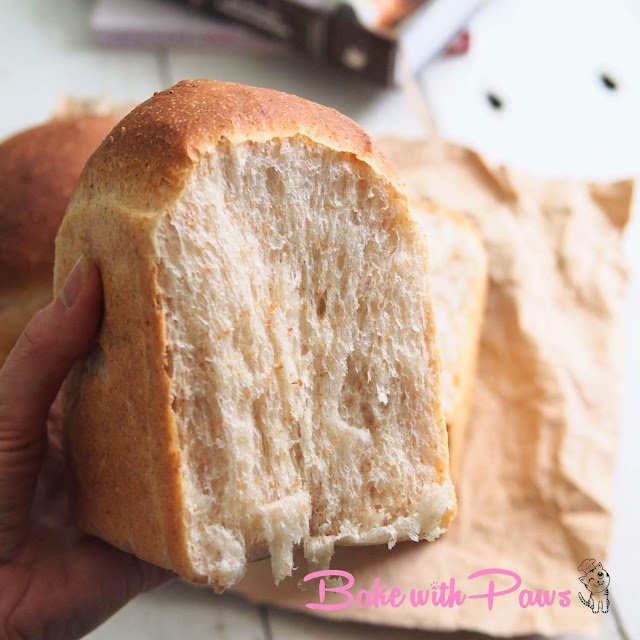
Characteristic of this bread: The texture is especially soft, fluffy and moist on the first day and it lasts very well for 2 - 3 days. It tastes very mild sourness.
Characteristic of this bread: The texture is especially soft, fluffy and moist on the first day and it lasts very well for 2 - 3 days. It tastes very mild sourness.
If you have any questions regarding this recipe or any other post, please leave me a comment in the “LEAVE A COMMENT” link and I will reply you as soon as possible.
Wholemeal Soft Sourdough Bread Recipe - Using Yudane Method
Yields: 1 loaf
INGREDIENTS:
Yudane:
70g bread flour
70g boiling water
Levain - 260g total (ratio 1:3:3):
40g sourdough starter (100% Hydration)
120g bread flour
120g water
Main Dough:
190g bread flour (I used high gluten Japanese Bread Flour)
90g wholemeal flour
30g brown sugar
1 tsp salt
35g butter, room temperature
90 - 100g full cream milk (Start with 90g first, if too dry then add the balance)
Utensil:
600g loaf pan (12" X 3.5" X 4" or 31cm X 9cm X 10cm)
If you don't have this pan, you can use 20cm X 10cm X 10cm loaf pan
METHOD:
Yudane:
- Add bread flour in a bowl, pour the boiling water and mix well with spatula or spoon.
- Cling film and place in the fridge for at least 4 hours or overnight. I prepared mine the night before.
- Take out from the fridge 30 minutes before using to return to room temperature.
Levain:
- One night before baking, mix all ingredients in a jar and cover.
- Let it ferment in aricond room temperature (approximately 25C) overnight until tripled. It took about 10 - 12 hours. The total weight should be around 280g. But, use only 260g.
Note: If you like to prepare levain on the same baking day, please use the ratio 1:1:1. Let it ferment in our tropical room temperature until tripled. It took about 3-5 hours depend how strong is your starter.
Main Dough:
- Put all ingredients (except butter), including the 260g sourdough starter (levain) and all yudane dough into a bowl of stand mixer. Using the dough hook, knead for 3 - 5 minutes (Chef Kenwood mixer, speed 2.5) until dough comes together. Add in butter and continue knead for 12 minutes until reach window pane stage. In this bread I continued knead for 16 minutes after adding in butter. Usually 12 minutes is good enough.
- Let the dough rest in a warm place for 60 minutes in a large greased bowl, covered with cling film or kitchen towel. It is fine if the dough doesn't rise until doubled the size after 60 minutes.
To shape:
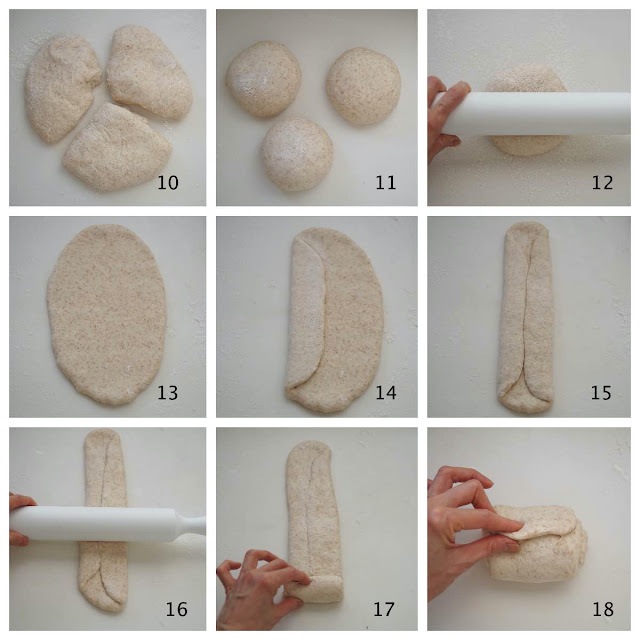
- Punch down the dough to release the air. Transfer the dough to a clean floured surface then divide into 3 equal portions.
- Form each portion to a ball. Flatten with rolling pin.
- Fold right to centre and fold left overlap it. Roll out with rolling pin into long rectangle shape. Roll up the dough like Swiss Roll until a small log is formed.
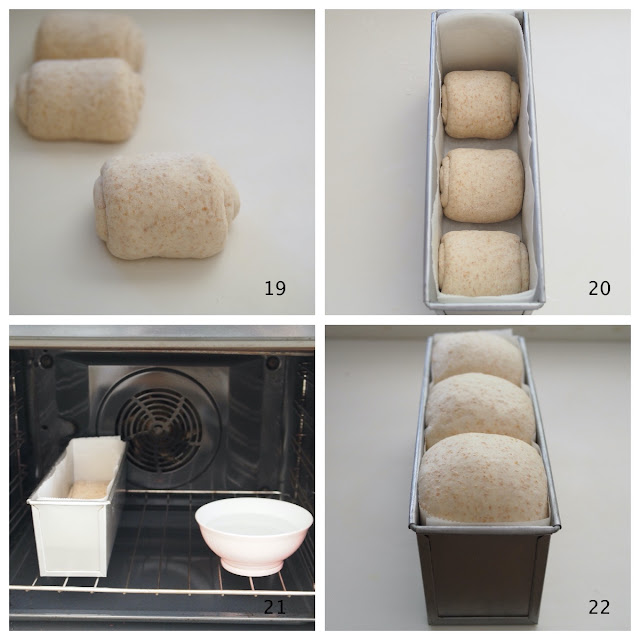
- Place all dough in a loaf pan lined with parchment paper. Let the dough proof at warm and dark place until it reaches the rim of the pan (This one took approximately 3.5 - 4 hours).
To bake:
- Fifteen minutes before baking, preheat the oven to 190C.
- Bake in preheated oven for 25 - 30 minutes, or until golden brown.
- Remove bread from oven and let it cool on rack completely before slicing.
No. 7 - To achieve the above window pane stage (thin membrane), I had knead for about 20 minutes total time. After adding butter, I continue kneading for 16 minutes. I stopped in between to prevent the motor overheat.
NOTES:
- For kneading, please regard the timing provided as an indication only. It is only meant as a guide. Timing may differ depending on the brand of flour and electric mixer used. The protein content may vary from one brand of flour to another.
- The liquid measurement given is also a guide. It is advisable to always reserve some liquid and not add it all in one go. This would give you the opportunity to adjust if necessary. If dough is too dry, add the reserve liquid one tablespoon at a time until the right consistency. This is because each flour absorbs water and hydrates differently.
- Please note that the proofing timing may also vary depending on your climate and environment. The humidity and temperature at your place will influence how your dough rises.
- Do also note that the baking temperature and timing provided are what works for my oven and should also be regarded as a guide only. Every oven behaves a little differently, so please adjust accordingly for your oven.


