

Transform your front door with cheerful spring door hangers using this do-it-yourself project. Crafting door decorations is simple, and we're delighted to provide you with a Free SVG file to get you started! If you make a purchase using any affiliate links below, we may earn a commission.
Spring is in the air, and what better way to welcome the season of renewal than by creating charming spring décor for your home?
An easy DIY spring door hanger is a perfect way to infuse your personal style and creativity into your front porch or entryway while adding a touch of seasonal flair.
Plus, this Spring door decor is a fun and easy project that anyone can do with just a few supplies.
In this tutorial, we'll show you step-by-step how to make this beautiful spring door hanger using the wet method to apply the free SVG design.
So gather your materials and let's get started with the instructions!
Pin for Later:
Craft Video Tutorial:
Like videos? I have a video tutorial for you! Subscribe to my YouTube Channel so you don't miss out on any future video tutorials.
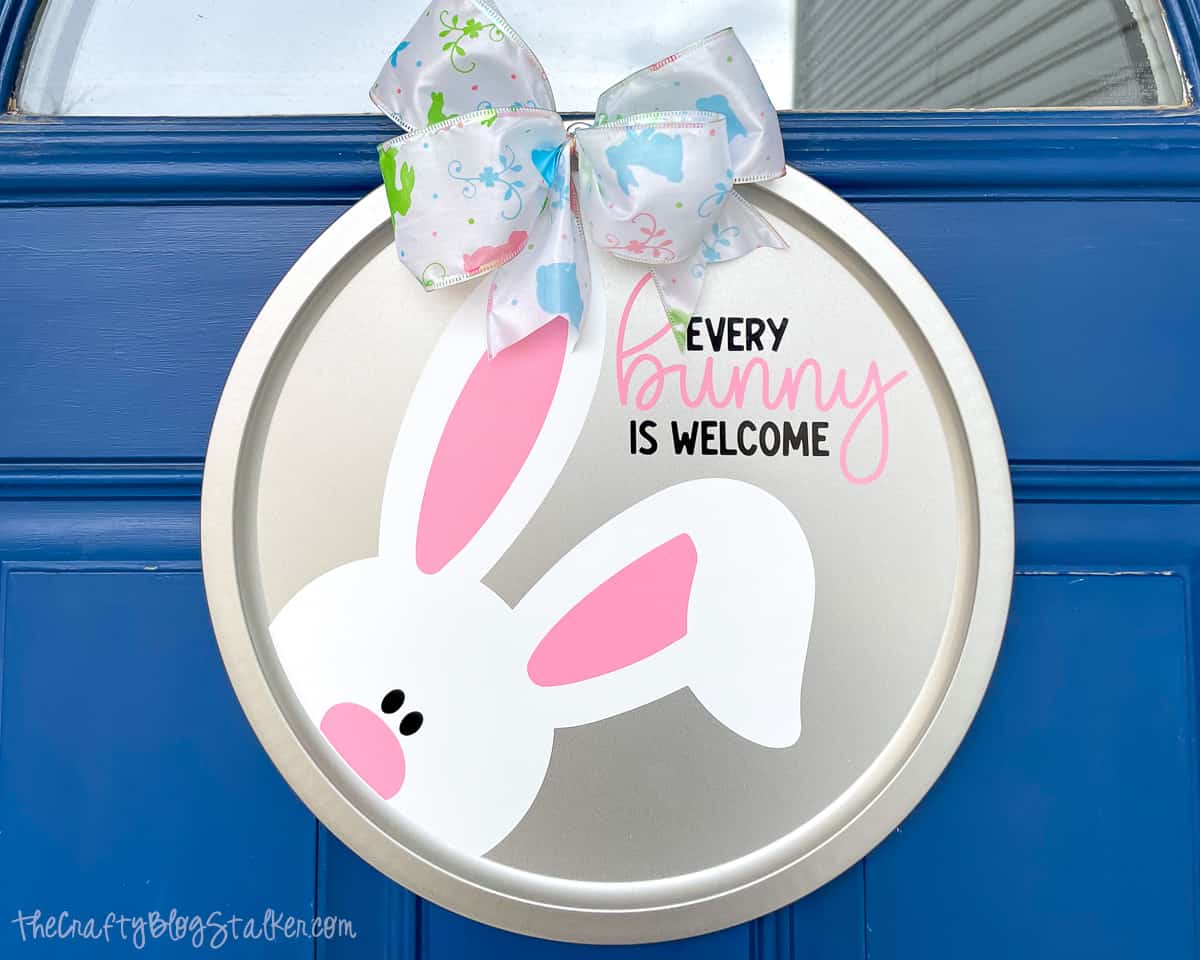
Every Bunny is Welcome Free SVG Cut File:
This digital media is for Personal Use Only - You do not have permission to redistribute.

There will be no watermarks on the downloaded version.
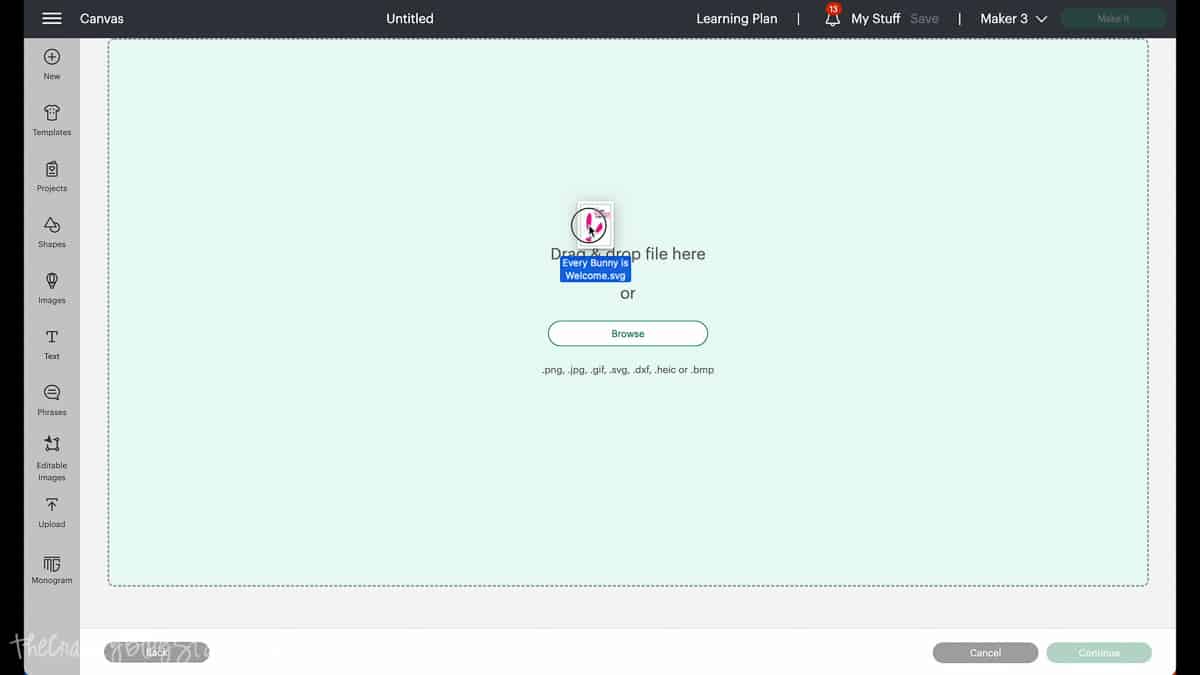
Cricut Design Space:
I use Cricut Design Space and the next several steps will be based on that.
If you use Silhouette Studio or a different design software, your steps may be different.
The first thing to do is upload the file into your cutter software.
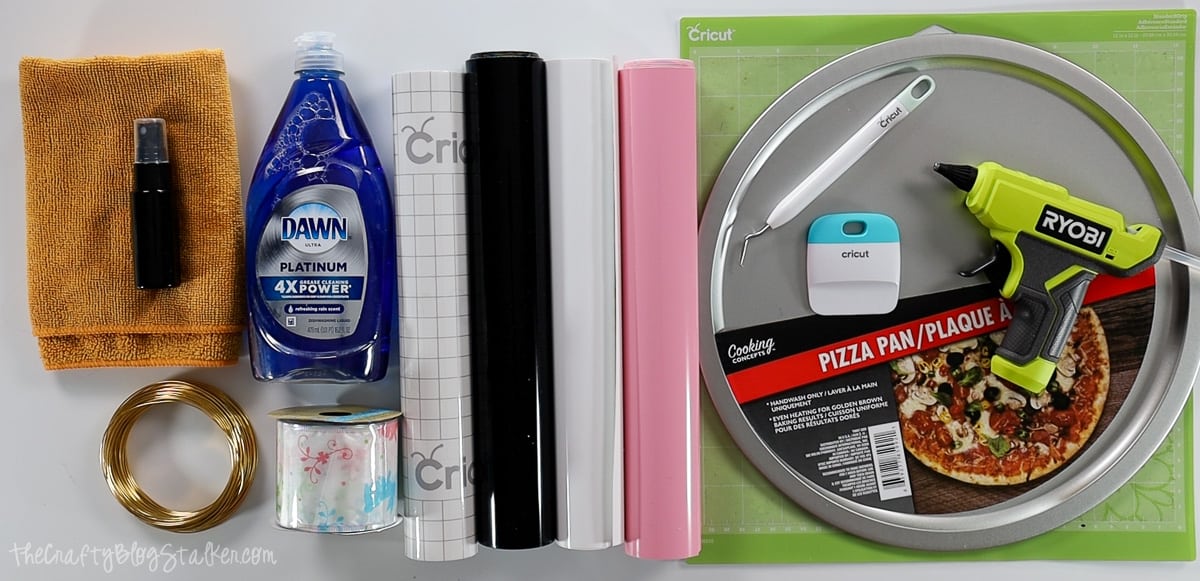
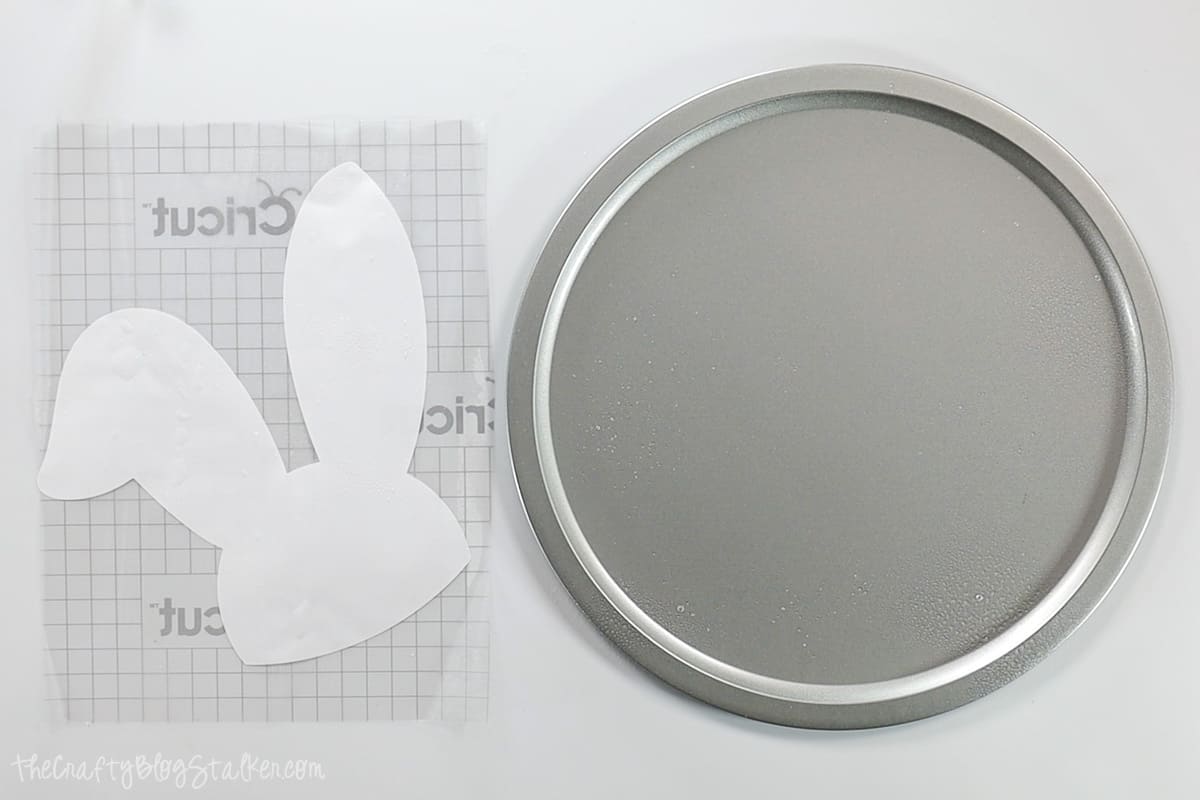
The design is already sized fit on the Dollar Tree Pizza Pan, but you can cut this design into different sizes to fit any need.
Select "Make It' to send the design to your machine to cut.
Follow the prompts in Cricut Design Space so you know what color of vinyl to load for each layer of cut.

Prep the Vinyl Layers:
My favorite weeding tool is the one with the little hook on the end.
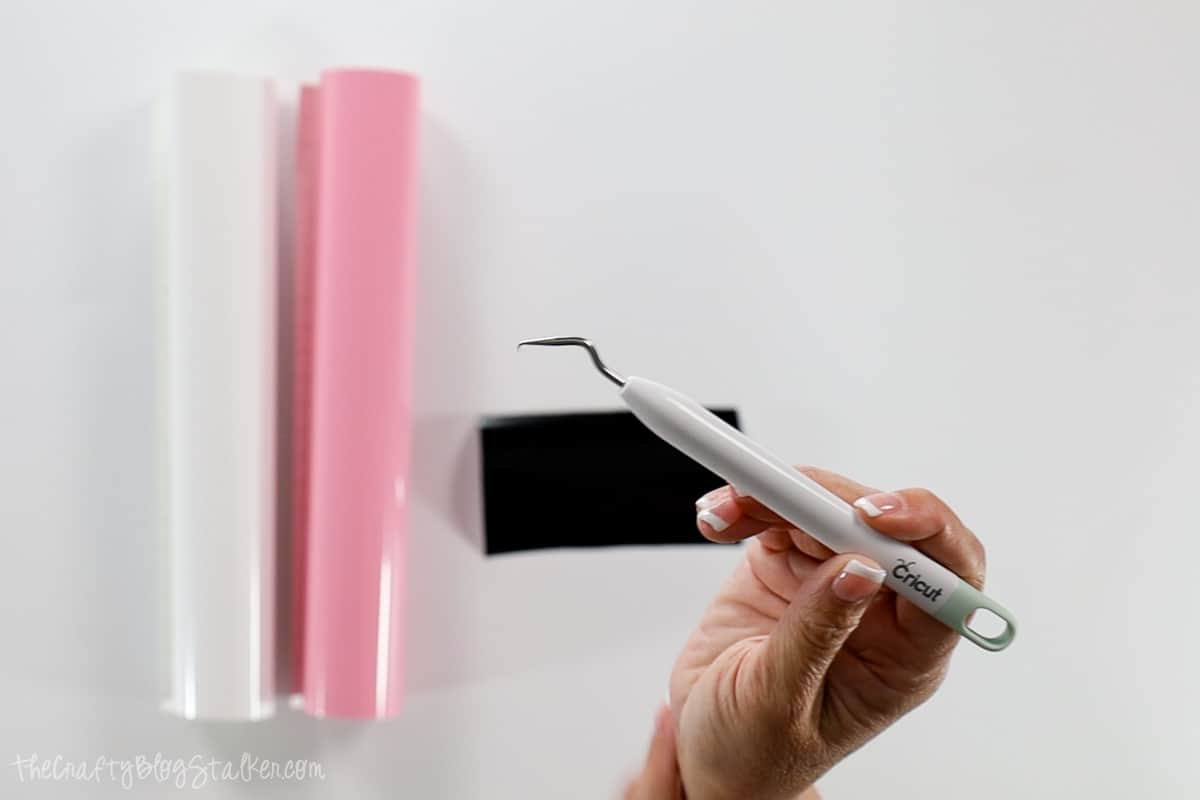
Weed the different colors of vinyl.
Cut a large piece of transfer tape, and apply it to the top of the white layer.
Wet Method to Apply Vinyl:
The wet method is a great way to apply vinyl to get perfect placement before it sticks completely.
In a small bottle add a single drop of dish soap. You really don't need very much at all.
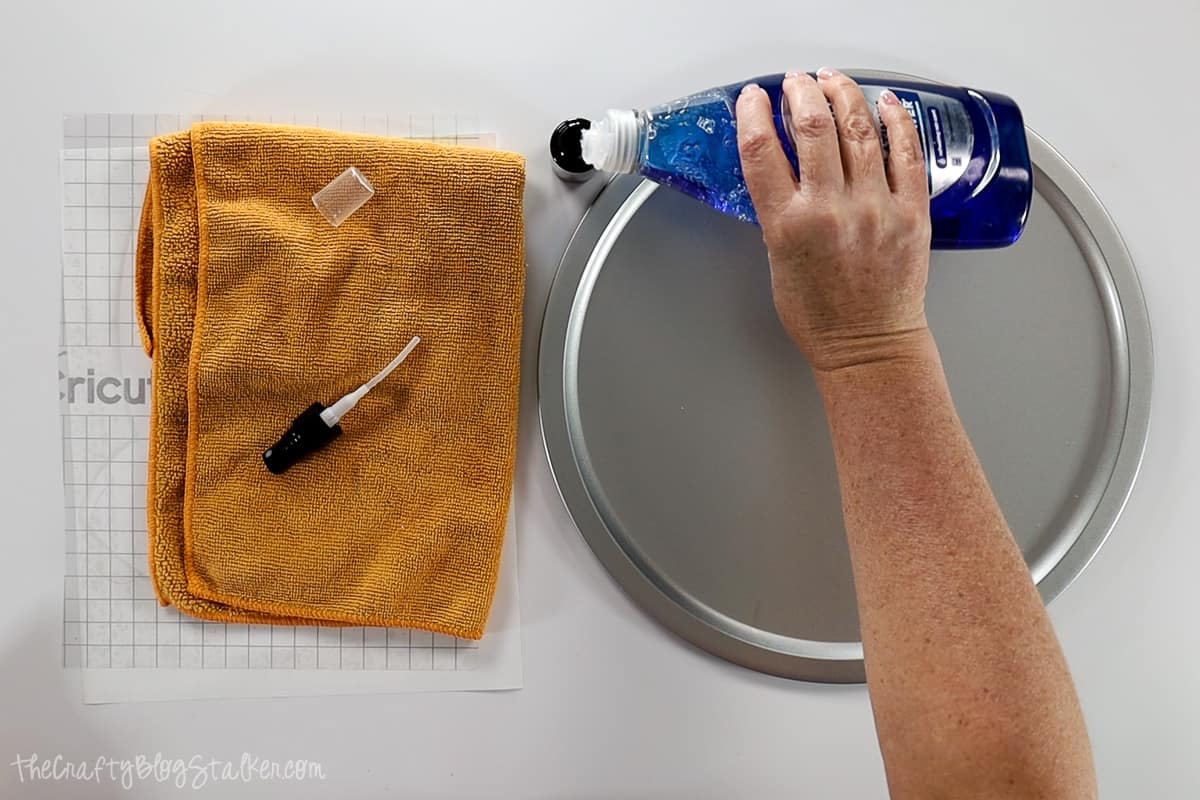
Fill the bottle the rest of the way up with water, screw on the top, and shake to mix.
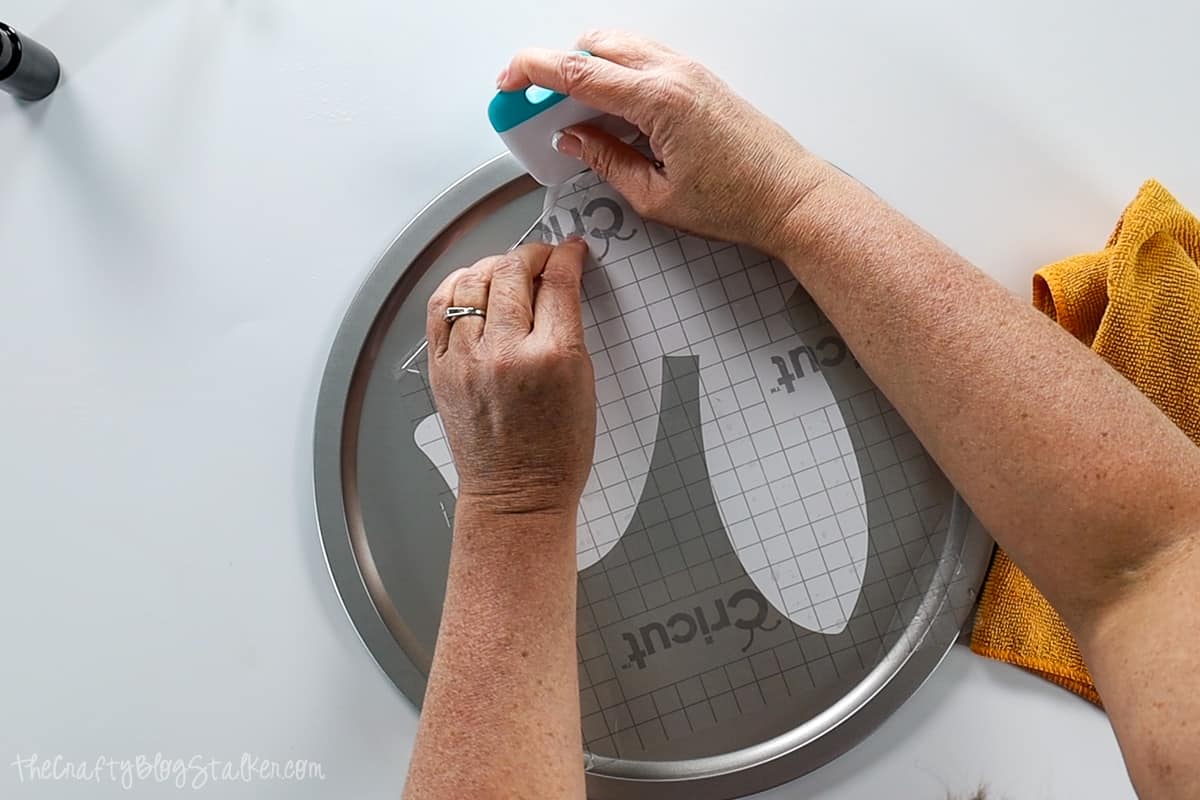
Remove the backing paper to the white bunny layer, and turn it over so the sticky side is up.
Apply a little bit of the soap/water mixture to the sticky side of the white vinyl and to the pizza pan.
Lay the white piece of vinyl onto the pizza pin and move the vinyl so it lines up with the inner line of the pizza pan.

Once the vinyl is in place, I want to remove as much of the water as I can so now the piece will stick.
Use a scraper tool and push out the water from behind the vinyl.
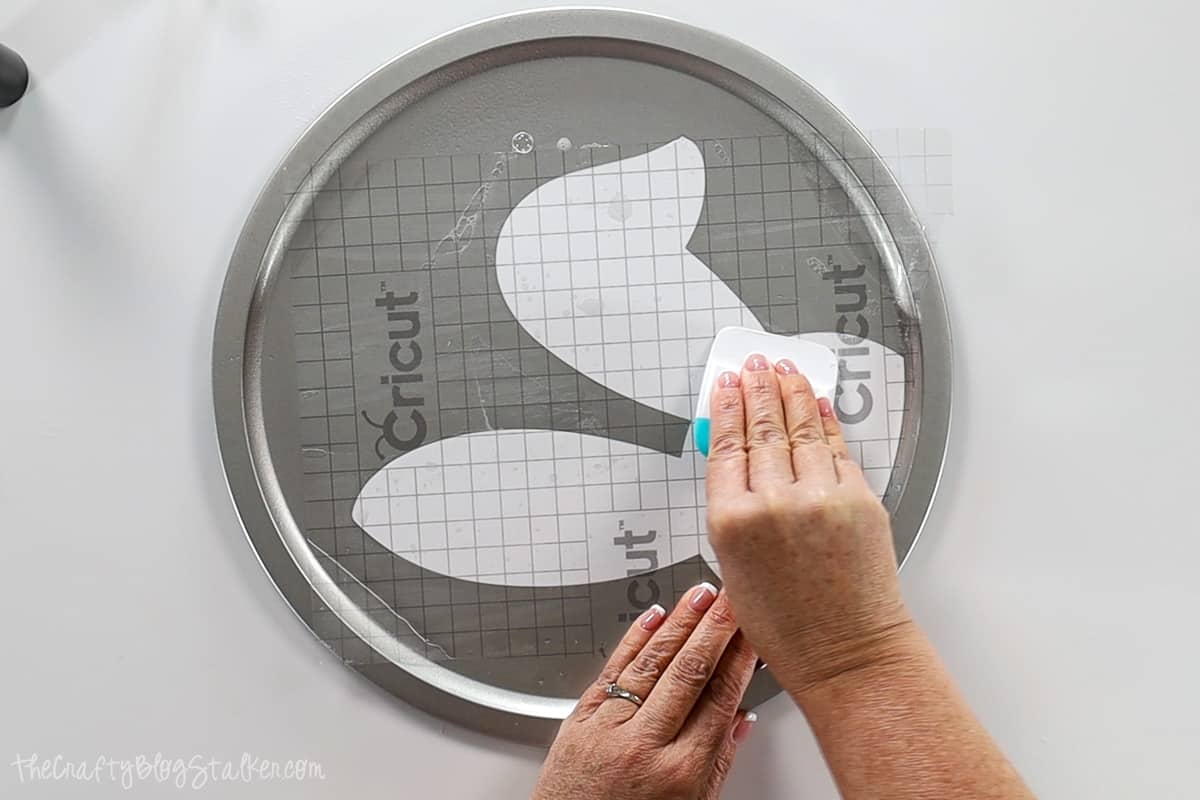
Keep a small hand towel or rag handy to soak up that pushed-out water.
Removing the transfer tape can be a little tricky to get started.
Carefully peel back a small section, and then hold the vinyl in place with the scraper tool.
Continue to pull the transfer tape straight back until the entire piece of transfer tape has been removed.
Go over the vinyl again with the scraper tool to push out any bubbles or water from behind the vinyl.
Cut a new piece of transfer tape and apply it over the pink piece of vinyl, the ears and the nose.
We are not going to use the wet method to apply this layer.
Align the nose along the bottom center of the white layer and roll the pink layer into place.
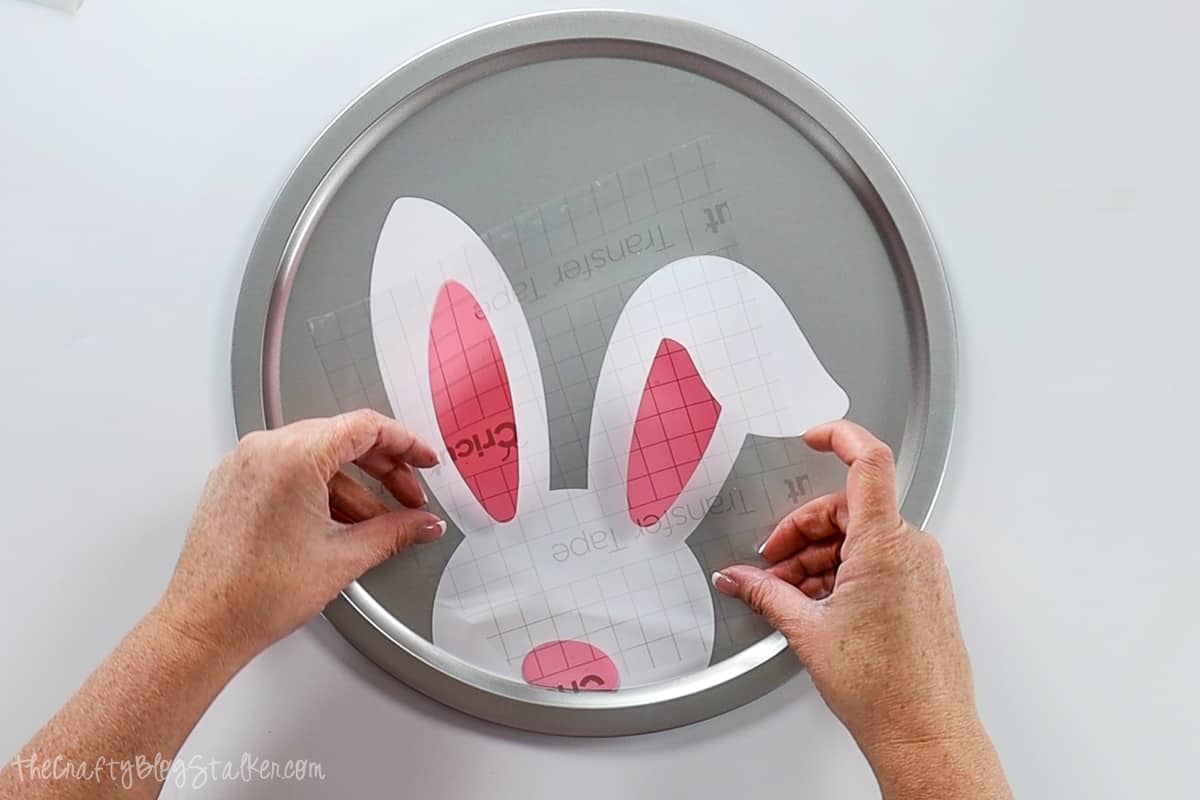
Again, use the scraper tool to go over the pink layer and secure it in place.
Peel back the transfer tape.
Cut a small square off of the last used piece of transfer tape, and use it to pick up the black eyes and lay them in place.
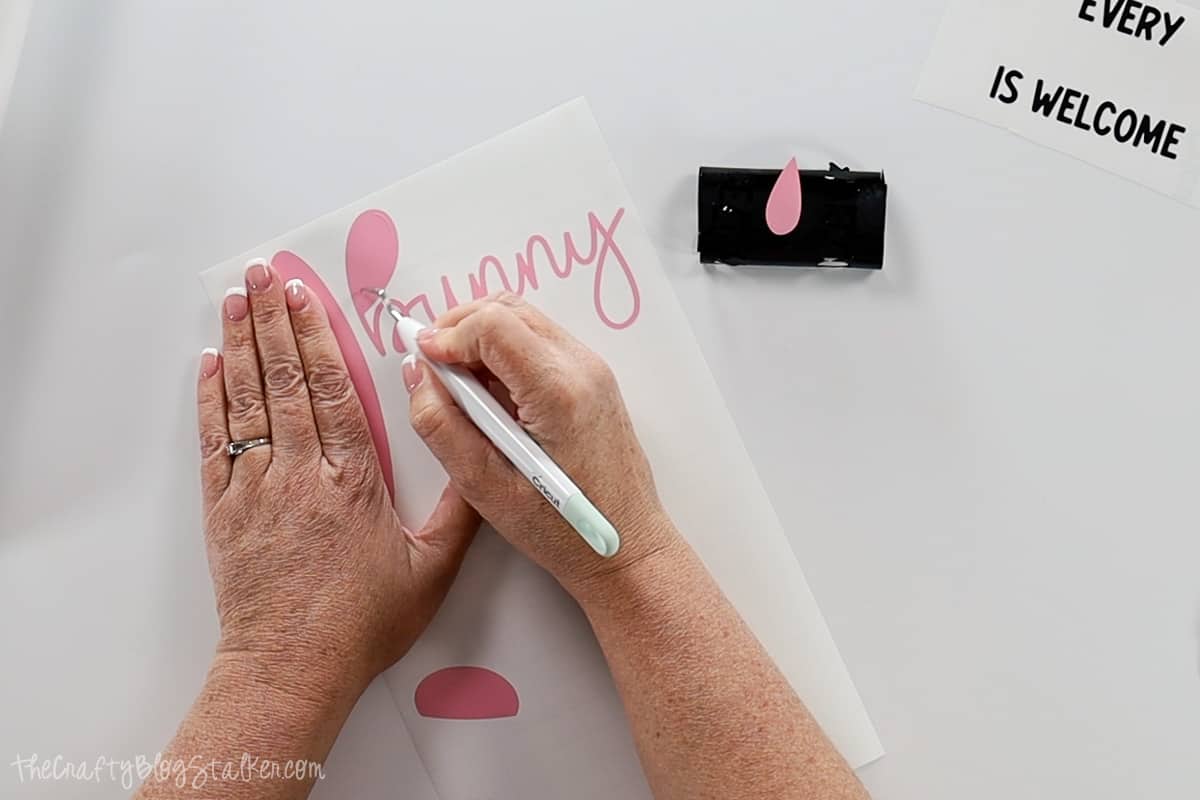
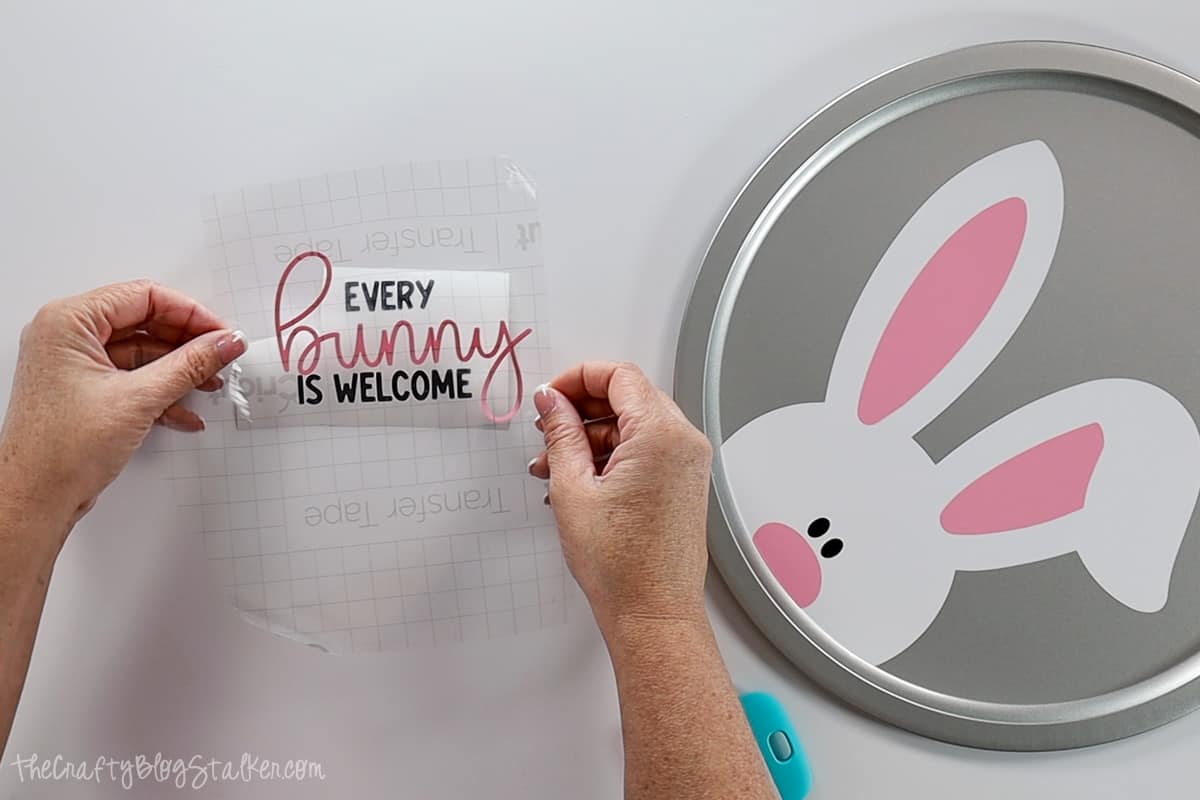
Using the same larger piece of transfer tape, apply it to the bunny word piece.
Remove the backing paper to the bunny word piece, and center the "bunny" between the two lines of black text.
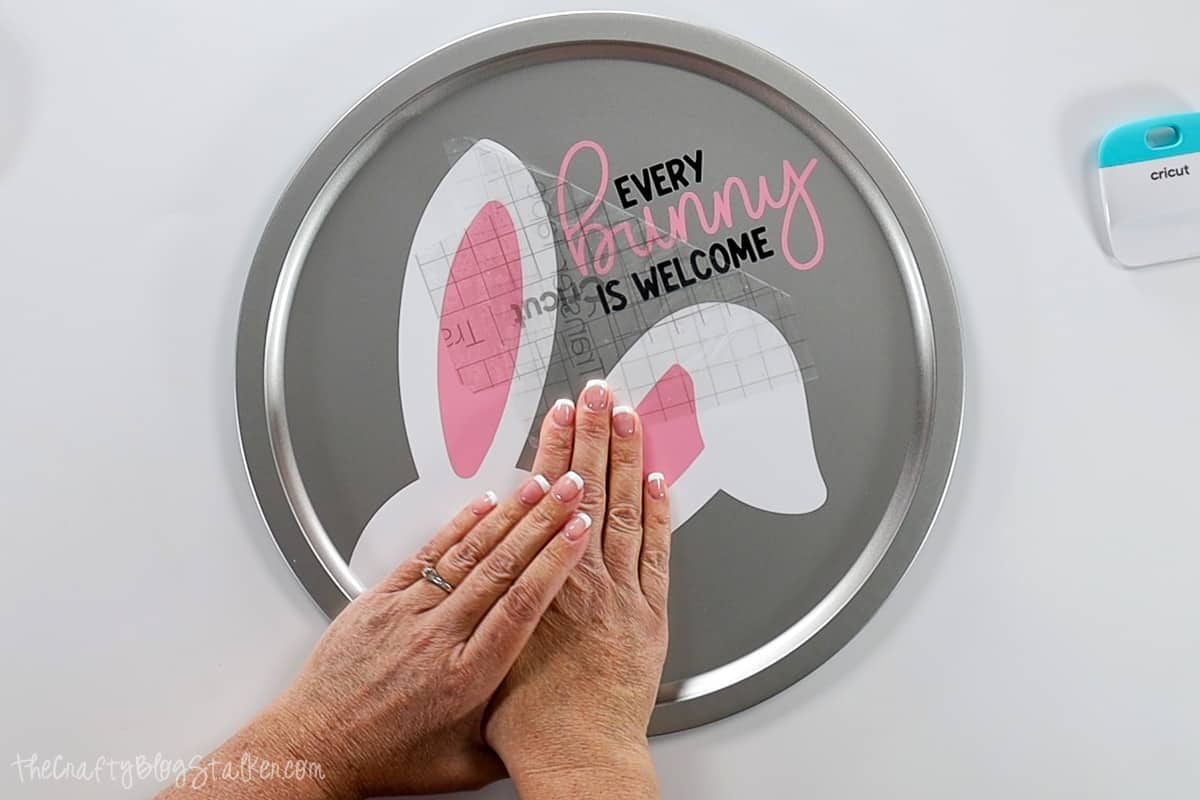
Remove the backing paper, and place the text on the door hanger. To remove the transfer tape, peel it straight back.
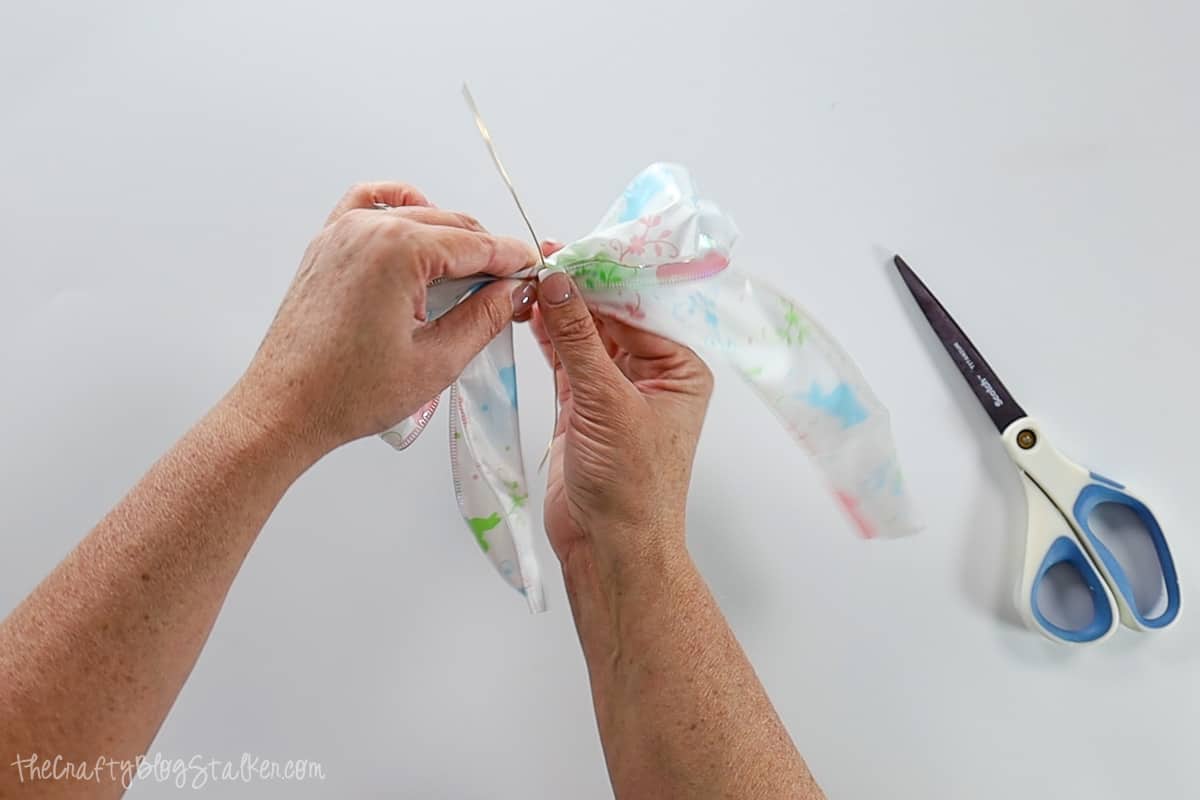
Easy Wired Bow:
I love to use wired ribbons to make bows because the wire makes them easy to shape.
The ribbon I am using is a 2-inch wired ribbon.
Make a loop and pinch, making sure to leave a length as a tail.
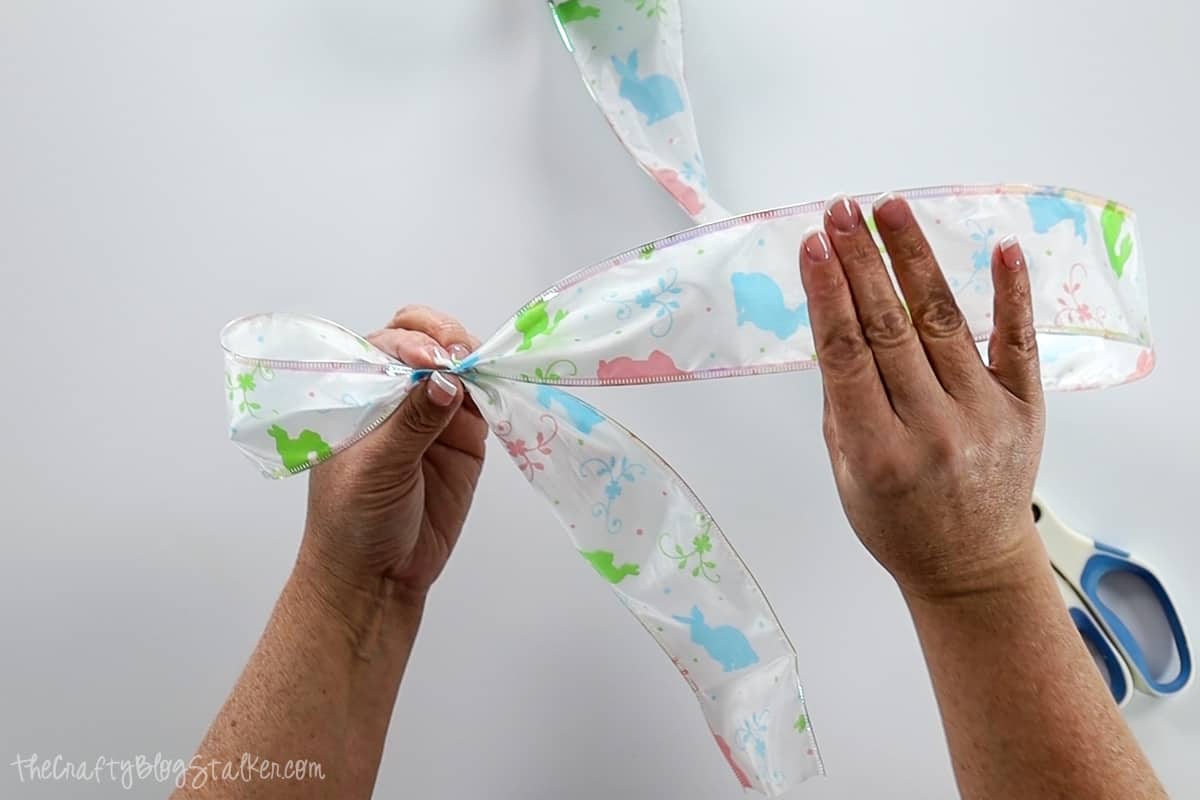
Make another loop opposite the first, and about the same size. Pinch in the middle.
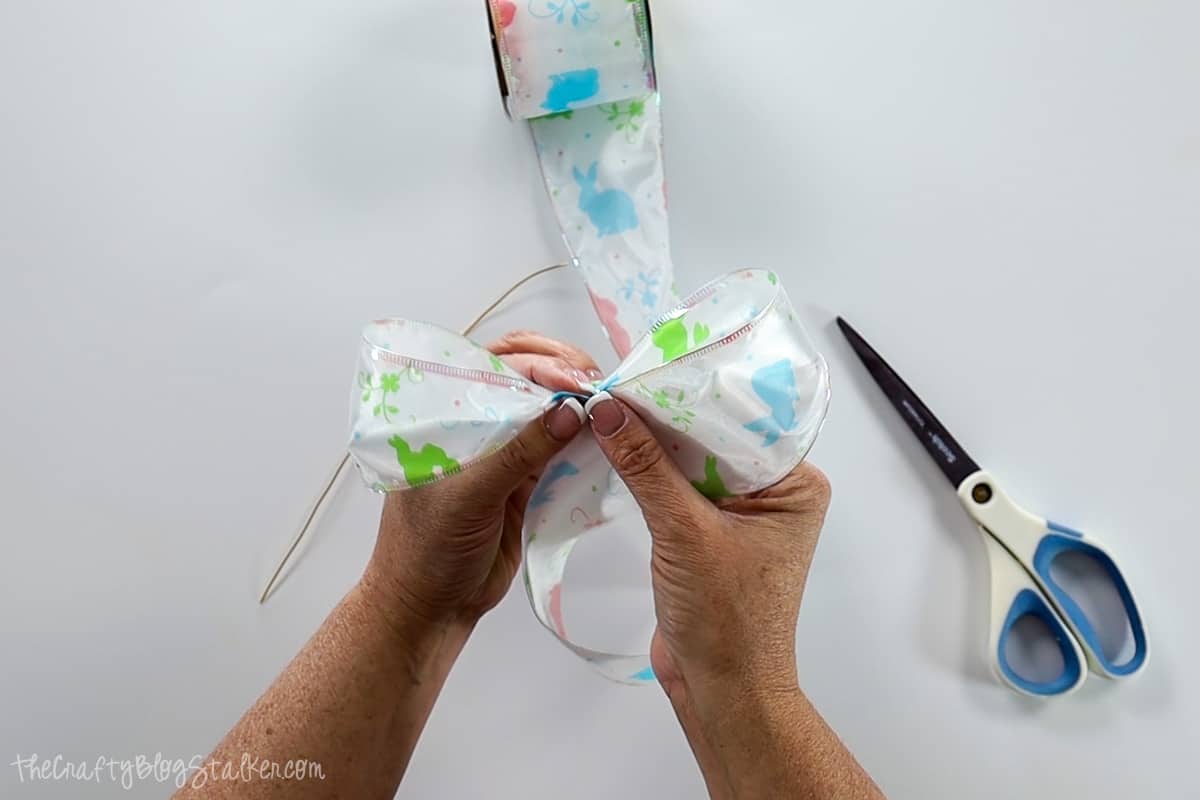
Create another loop on top of the first, just a bit smaller. Pinch to hold the loops.
Create a fourth on top of the second, the same size as the last loop. Pinch to hold the loops.

Cut the second tail so it is about as long as the first.
Wrap a piece of wire around the center, where you were pinching to hold everything together. Trim off the ends of the wire.
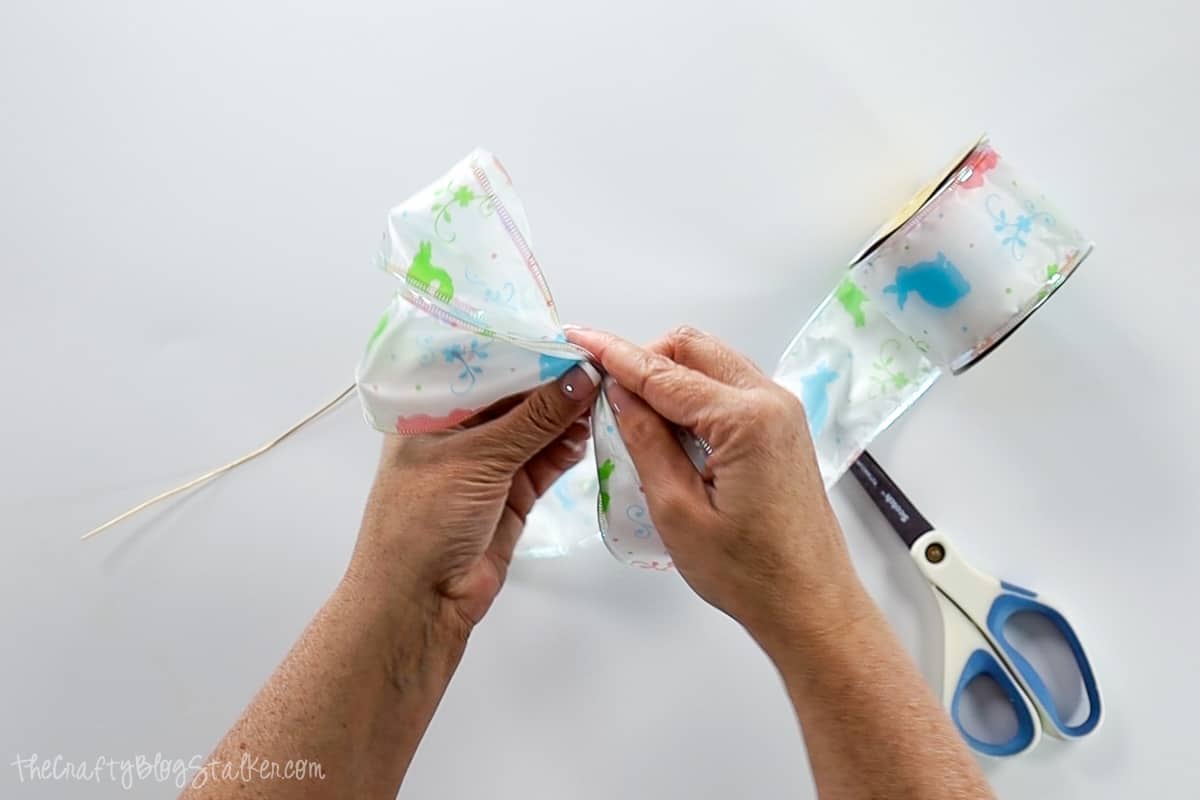
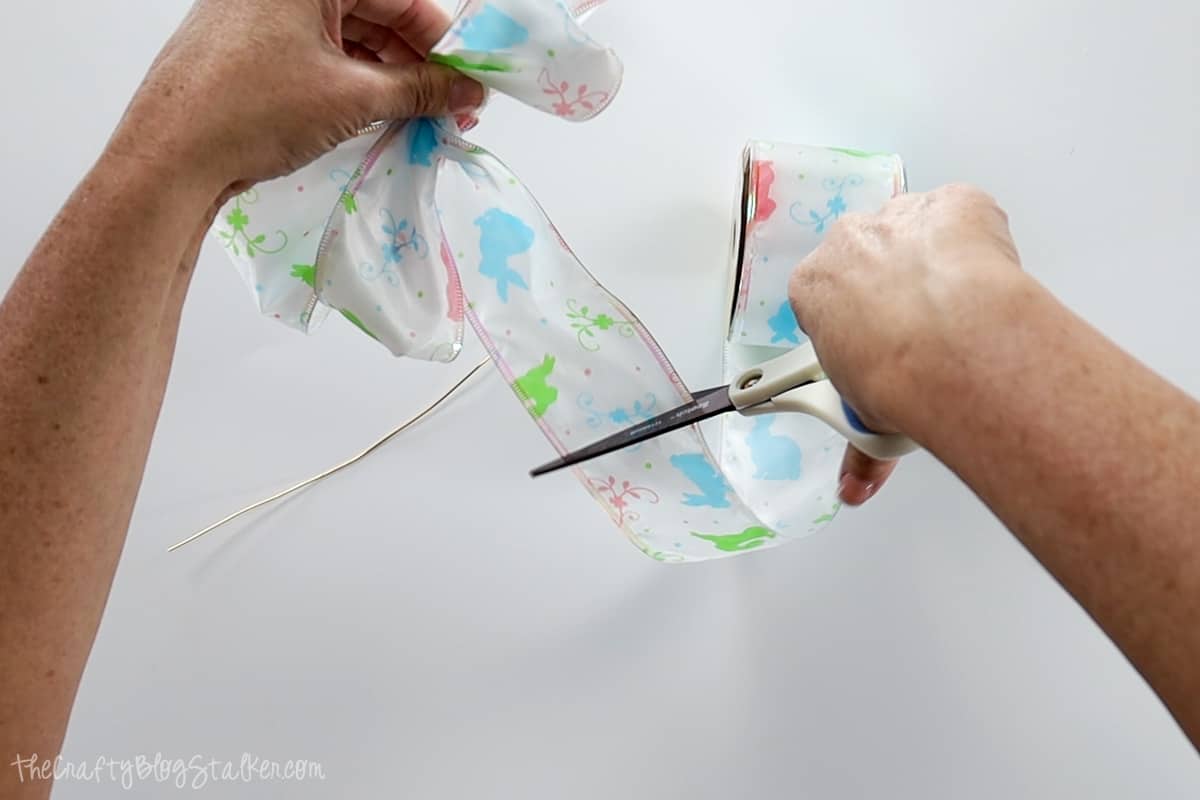
Cut a dovetail in the ends of the ribbon by folding a tail ribbon in half and cut down from the center. Repeat on the other tail.
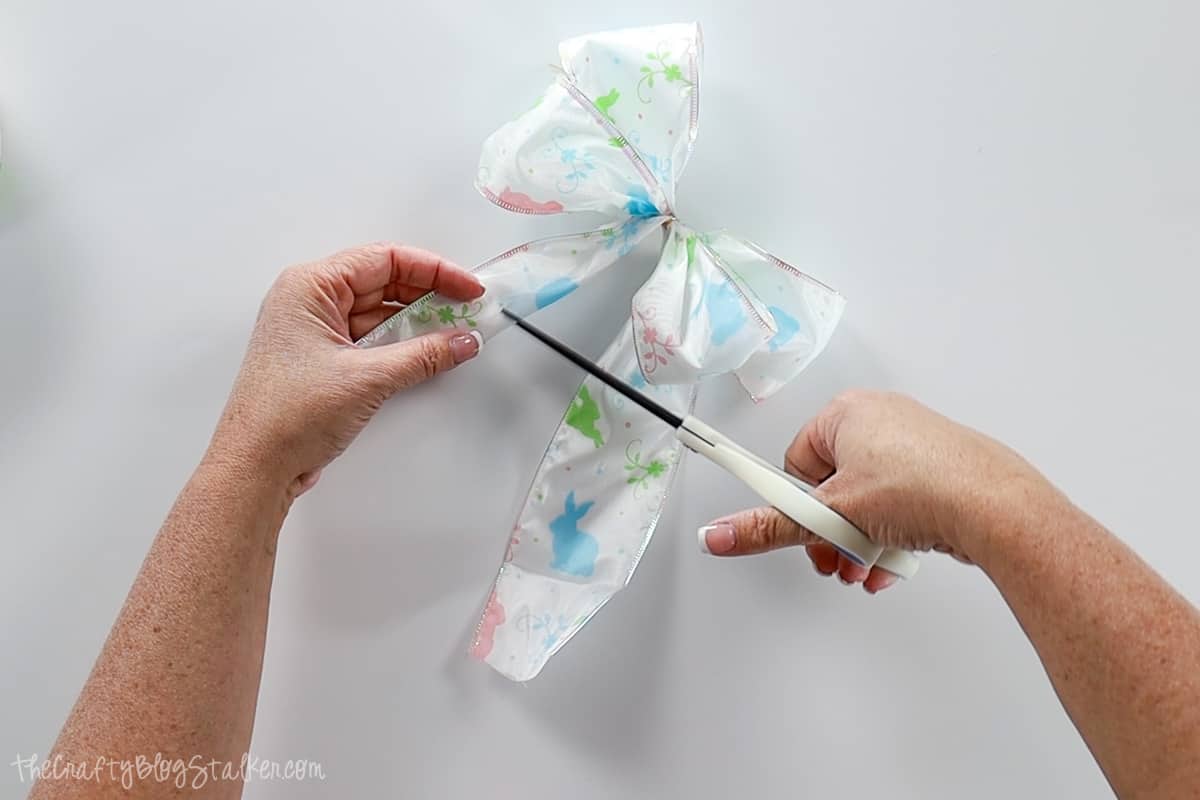
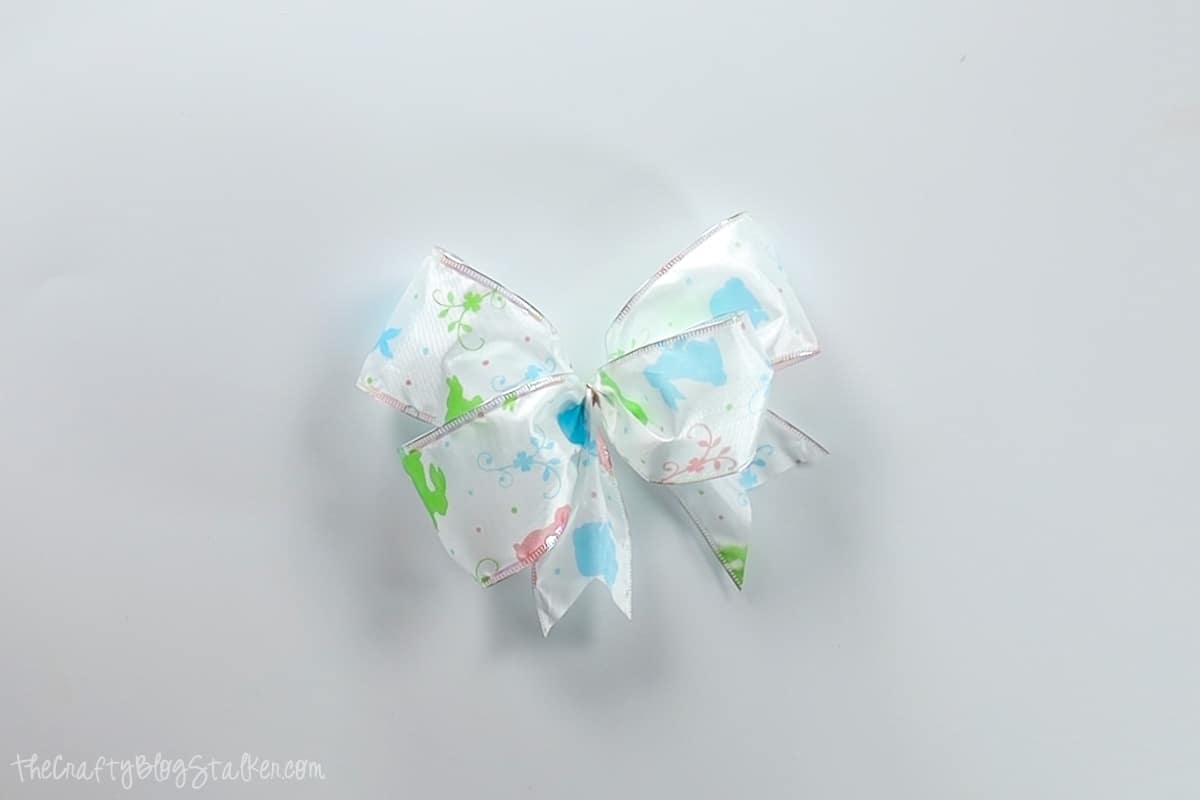
Fluff the bow by reshaping that wire until you have a pretty bow.
Hot Glue:
Add a glob of hot glue at the top of the door hanger to adhere the bow.
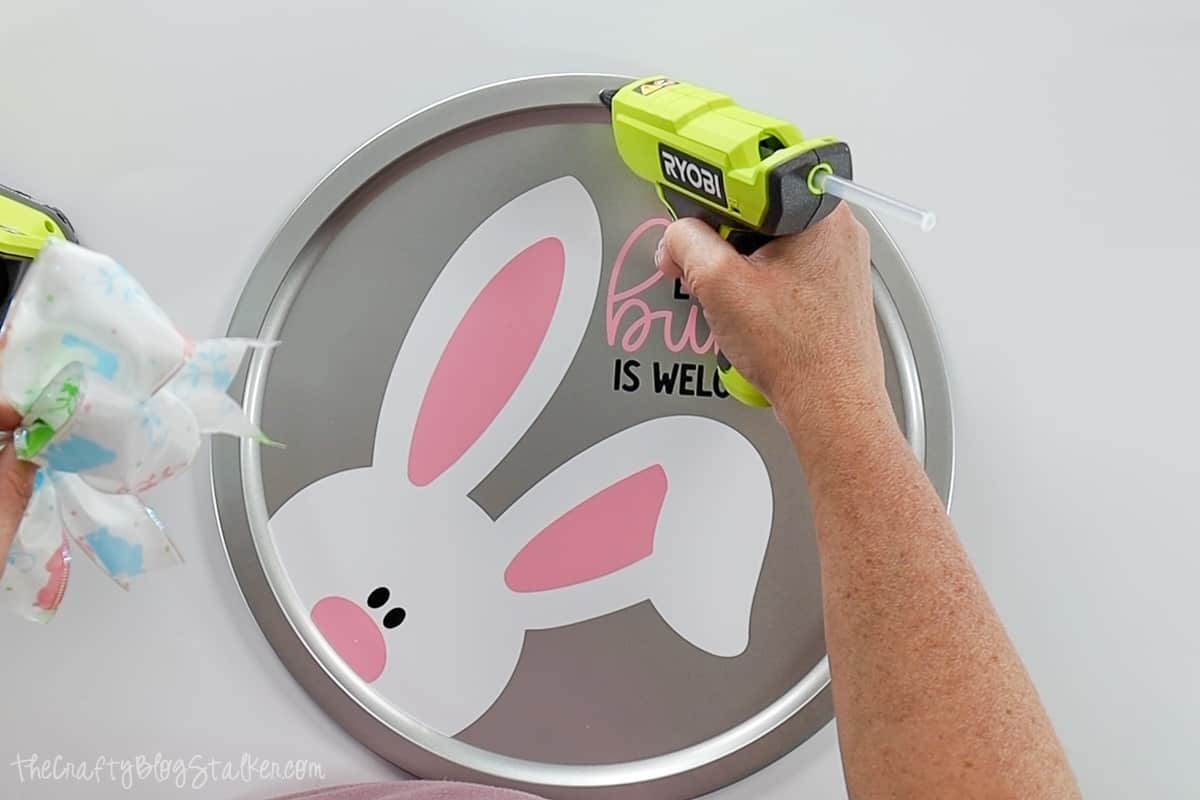
Carefully turn the door hanger on its front.
Cut a length of ribbon about it 6-8 inches long and center it on the top portion of the back of the door hanger.
Apply a line of glue about an inch long on the right side where you want the ribbon hanger to be.
Press the ribbon into the glue.

Repeat on the left side to secure the ribbon hanger in place.
This easy DIY Spring wreath is so cute, and so much fun to make! I just love a good DIY project.

All that's left is to hang your simple Spring wreath on your front door and welcome Spring and Easter to your front porch.
More DIY Spring Crafts
Crafting and DIY are what we are all about here at The Crafty Blog Stalker, and we have several tutorials to show you how!
Be sure to look around the blog for more fun Spring Craft Tutorials!
Frequently Asked Questions:
Yes, it can be cheaper to make your own wreaths instead of buying them. Especially when you purchase supplies from your local dollar store.
Yes, you can make money selling homemade wreaths. Etsy is a popular place to sell handmade items. You could also try local craft fairs, or selling on Facebook Marketplace.
Our Crafting Essentials List:
- The Cricut Cutting Machine is easily our favorite crafting tool. We use it in so many of our tutorials!
- These MakerX Crafting Tools are perfect for keeping in the craft room, and are always ready when you need them!
- This Fiskars Paper Trimmer is easy to use and cuts nicely without frayed edges.
- These Scotch Precision Scissors cut like a dream and you get multiple pairs in a pack!
Follow TCBS
The post How to Make a DIY Spring Door Hanger and a Free SVG appeared first on The Crafty Blog Stalker.