Little did I know that a couple months later, there would be a serious bread shortage in stores! I'm so glad I was already in the habit of baking all our bread, and if you've found yourself in a new position of needing to bake all of your own, maybe this will be a good place to start?

This recipe makes two loaves of bread, which would very easily get eaten in two days in our family... But I'm a mean mom, and I ration what the kids eat, so they last us more like 3-4 days. I cool them, slice, and pop one loaf straight into the freezer and leave the other on the counter. Once we're almost done with the first loaf, I pull out the other and make a mental note to bake a couple more loaves the next day!
(I'm not fancy and this blog platform doesn't support recipe widgets, so I've got a printable recipe card at the bottom that will hopefully work for you!)
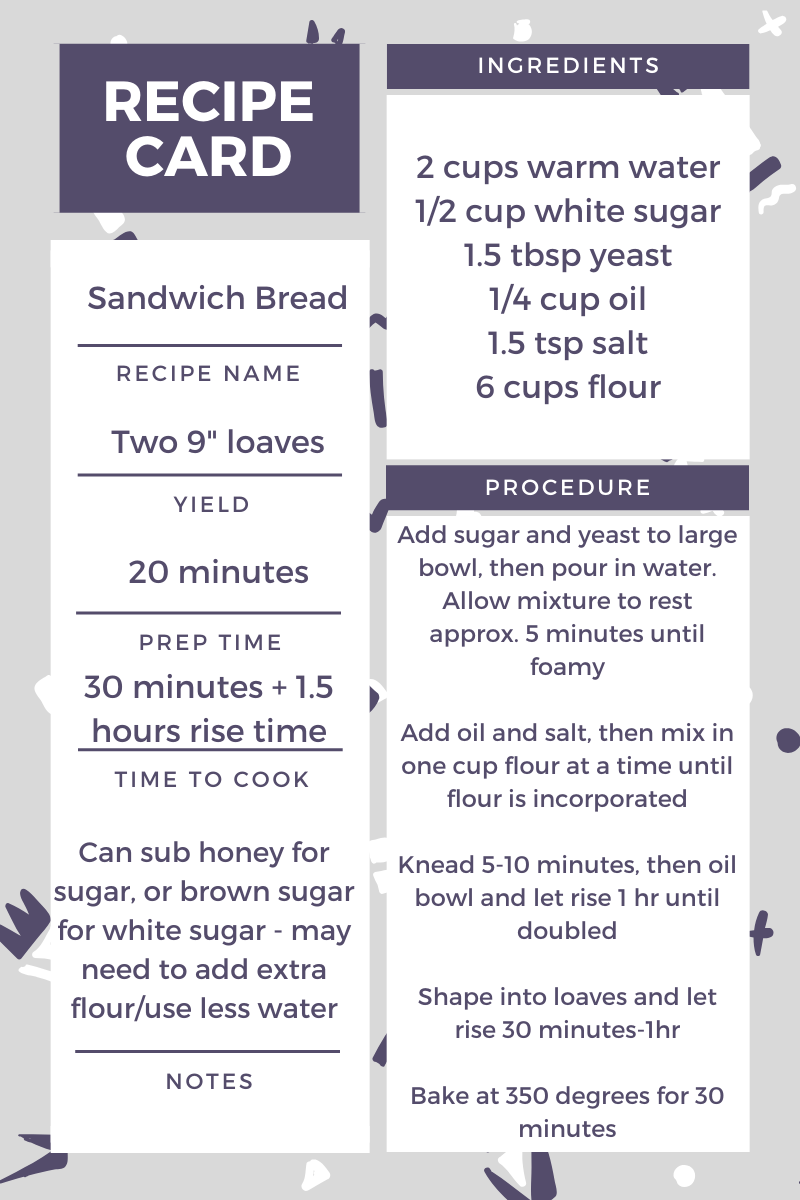
Ingredients:
-2 cups warm water (NOT hot, you will kill the yeast!)
-1/2 cup white sugar (can sub 1/4 cup brown sugar, or sub honey but you may need to add extra flour or use less water to counteract the extra liquid)
-1.5 tbsp yeast (if you have a Costco, just buy the big package of Red Star yeast!)
-1/4 cup oil (any neutral oil is fine, I use olive oil)
-1.5 tsp salt
-5.5-6 cups flour
(I use 1 cup whole wheat, the rest all-purpose because it's what I always have on hand. Bread flour is fine, it'll make it rise a little higher but it's also more expensive and I can't buy it in bulk around here)
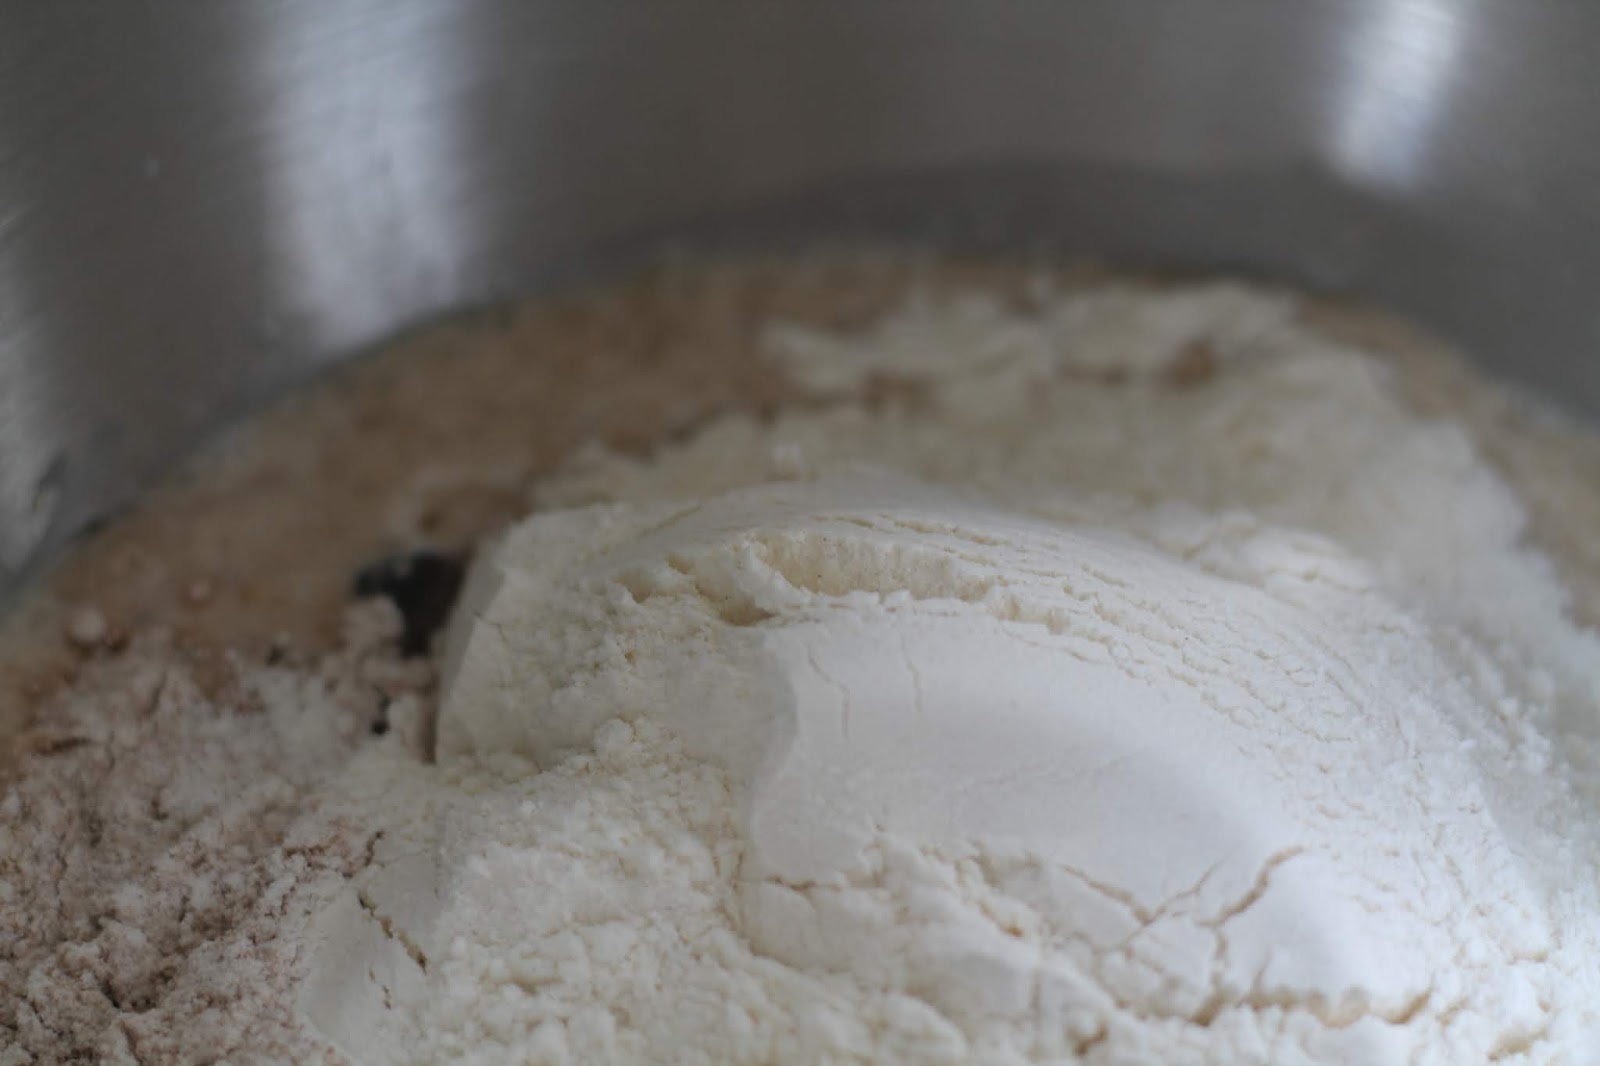
Add sugar and yeast to large bowl, then pour in water. Allow mixture to rest approx. 5 minutes until foamy. Add oil and salt, then mix in one cup of flour at a time until flour is incorporated.
If you have a bread machine, you can halve this recipe and let the machine do the work for you on the "dough" setting, then do the second rise in the loaf pan so that you don't have a weird square loaf of bread.
If you have a bread machine, you can halve this recipe and let the machine do the work for you on the "dough" setting, then do the second rise in the loaf pan so that you don't have a weird square loaf of bread.
Knead 5-10 minutes (I use the dough hook on my stand mixer), then oil bowl, cover with plastic wrap or a wet towel, and let rise in a warm place for 1 hour until doubled. Dough will be somewhat stiff before rising.
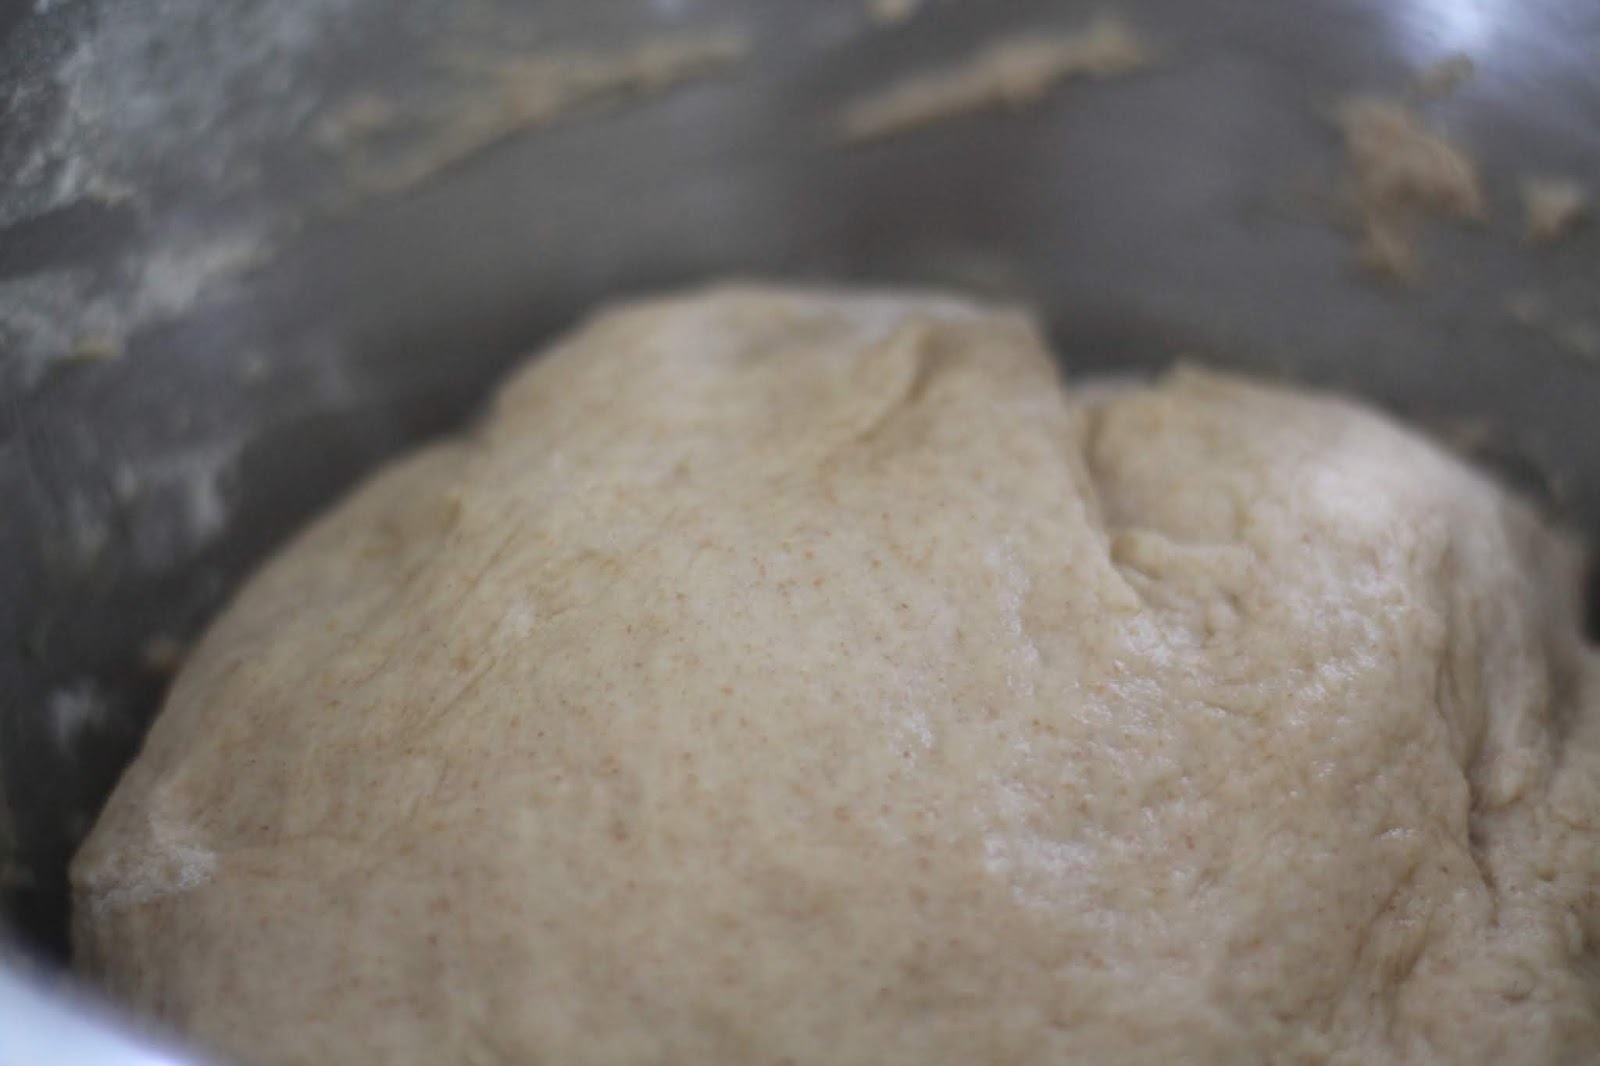
(If you don't have a warm place in your house, popping the rising dough into the oven with the light on and door shut will provide it with the perfect temperature for good rising! Just don't preheat the oven with the dough in there...)

Remove dough from the bowl onto a floured surface, and divide into two equal pieces. Press each piece into a rectangle, approximately 9" wide, then roll tightly into a cylinder, pinching the seam at the bottom and tucking the ends under. Place loaves in greased or parchment-lined 9" loaf pans, and cover with plastic wrap or a wet towel. Let rise 30 minutes-1 hour, or until dough has risen 1" above lip of pan.

Bake at 350 degrees for 30 minutes, then cool on a rack 10 minutes before removing from pans to cool the rest of the way.
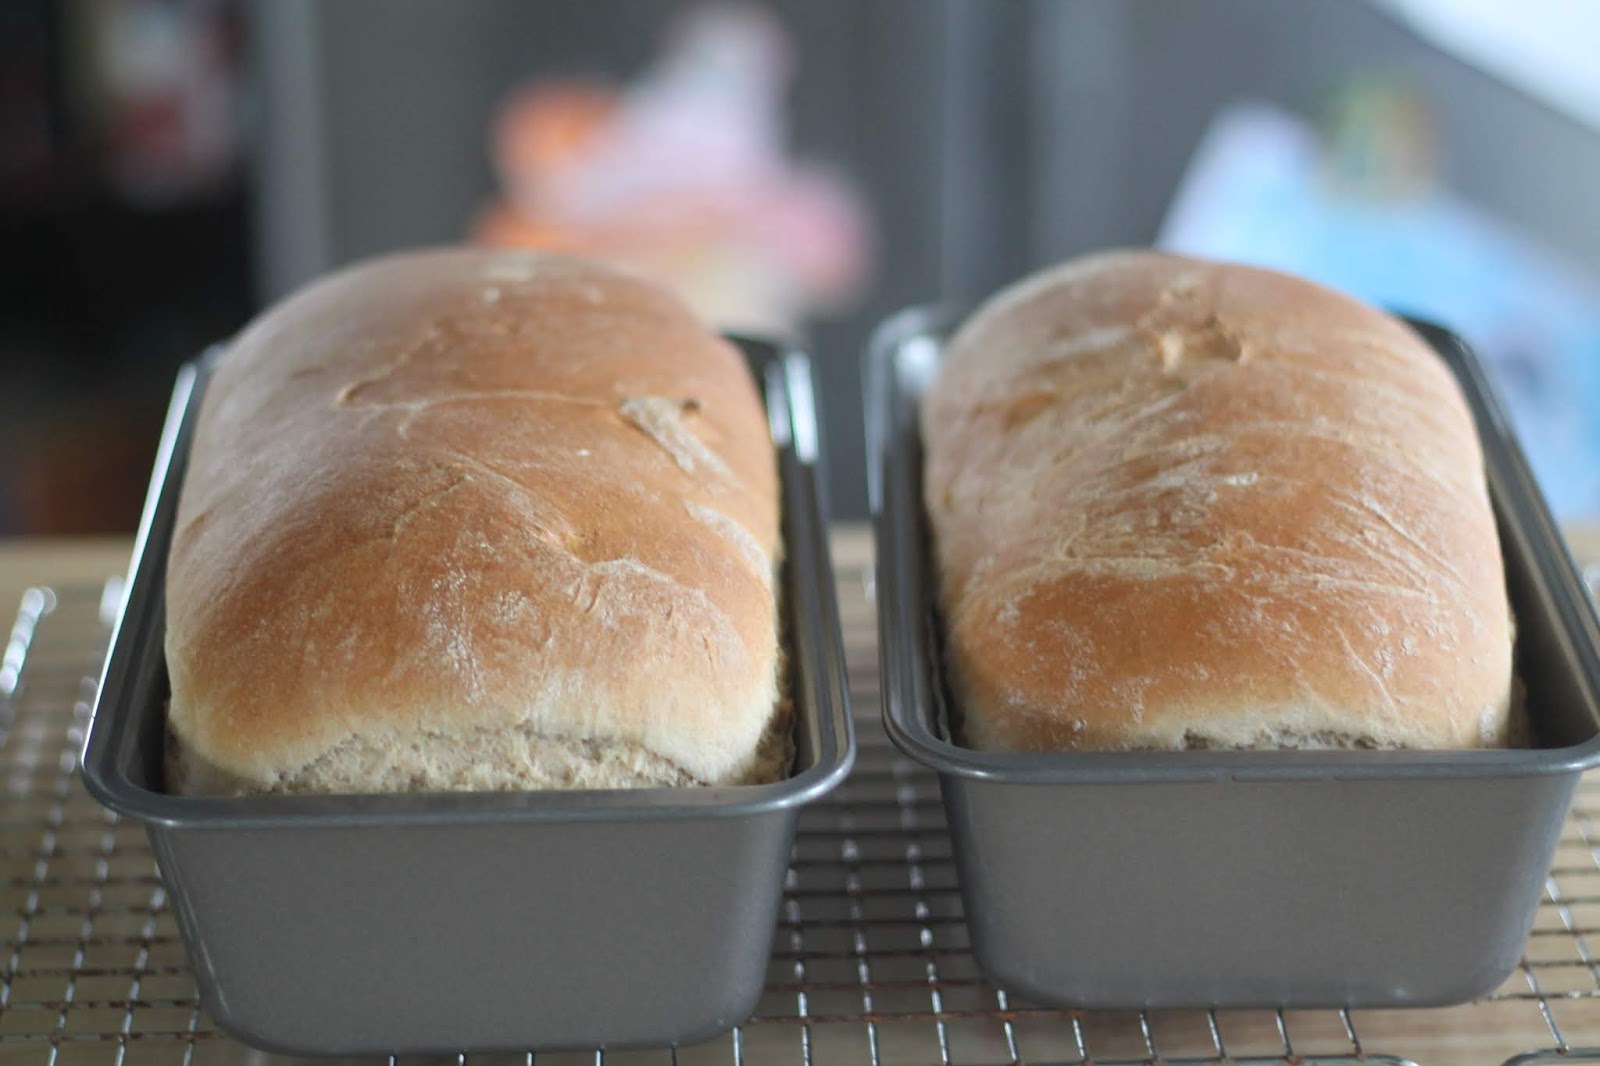
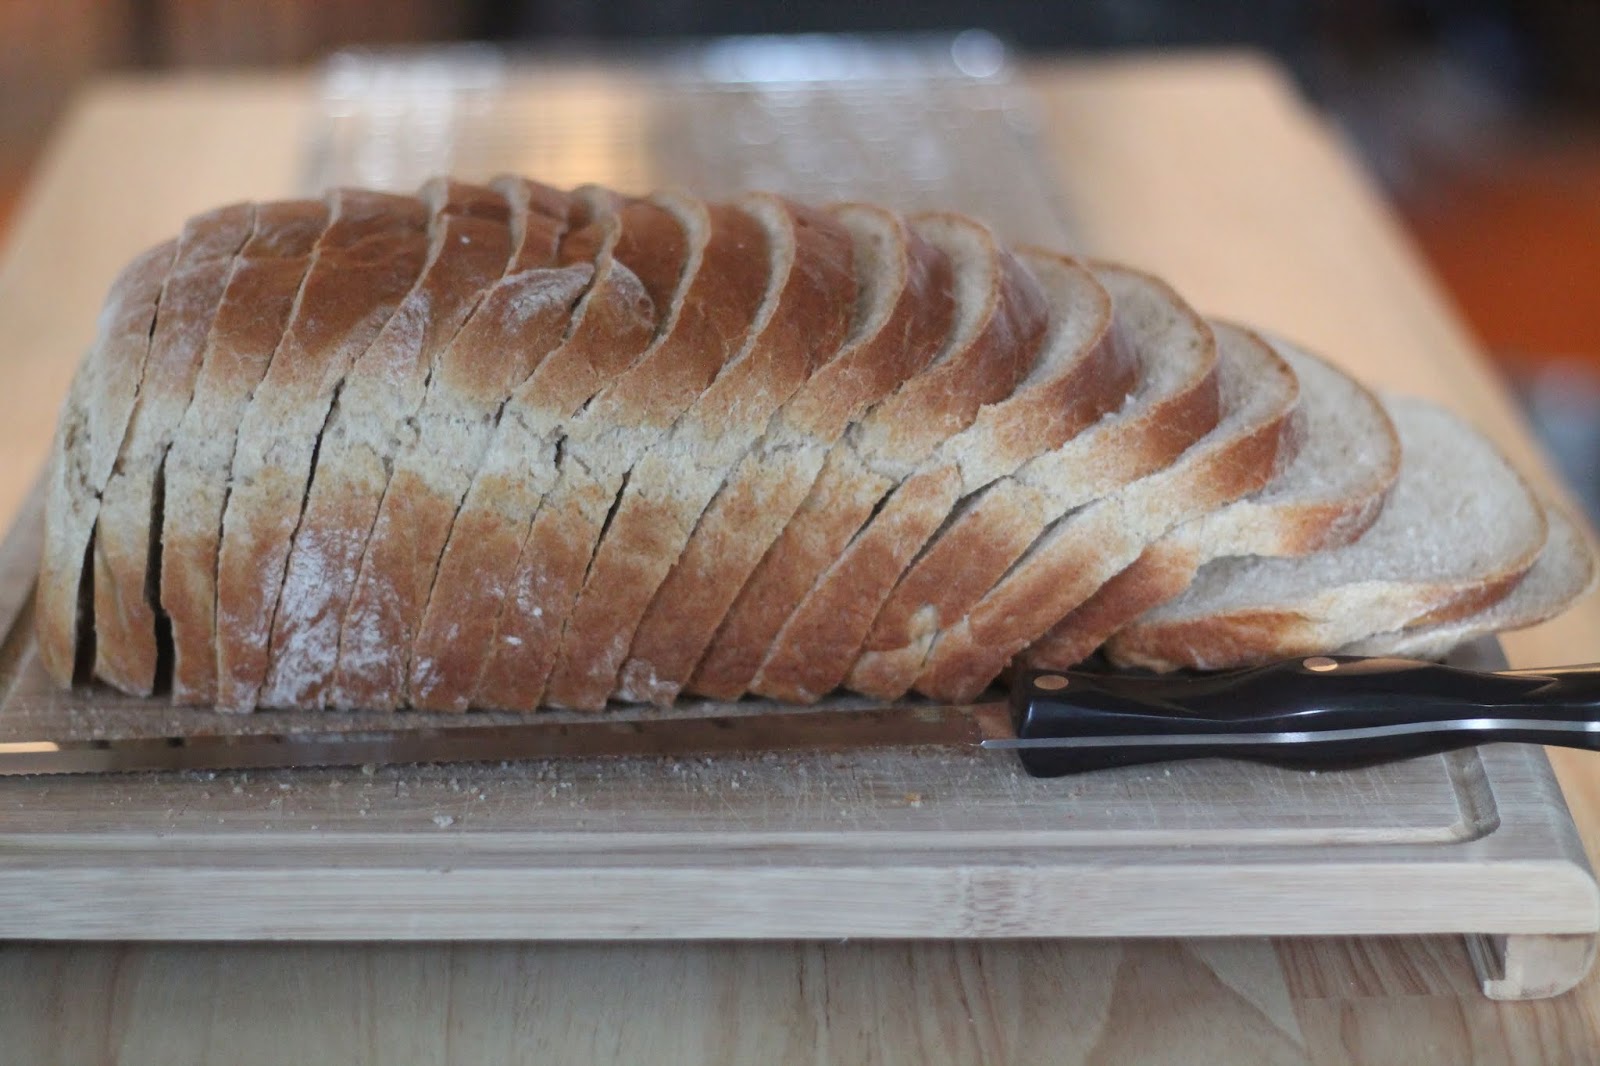
Cool completely (or as much as you can possibly stand) before slicing.

Somehow I always manage to cut this into exactly seventeen slices. It's eerie. Store in a plastic bread bag, or let me know your much better storage solution!
Links to materials used are affiliate:
These loaf pans are standard, inexpensive, and easy to use
I adore my loaf pan liners - I reuse them several times before they're too misshapen to use anymore, and they've saved me so much time since I don't have to grease the pans or even really wash them!
A dough scraper really helps when the dough is sticky or super-soft and hard to transfer to the loaf pans.
This is the workhorse mixer I've been using for 11+ years! Pricey, but on sale frequently (like now!), and I use it almost every day.
I've been saving old bags from store-bought sandwich bread and storing our bread in those, but once they get torn up and tossed, I might replace them with these bread bags. But I wouldn't mind a reusable alternative! Right now this storage bin is on my wish list - maybe for my birthday next month!
Last, a good bread knife makes a world of difference - you need something long and very sharp to cut your sandwich bread into thin, even slices.